
In this post you'll discover how I went from a simple photo of my room to an ultra-realistic wallpaper, combining generative AI and a manual touch in Photoshop.
1. Inspiration: the design that started it all
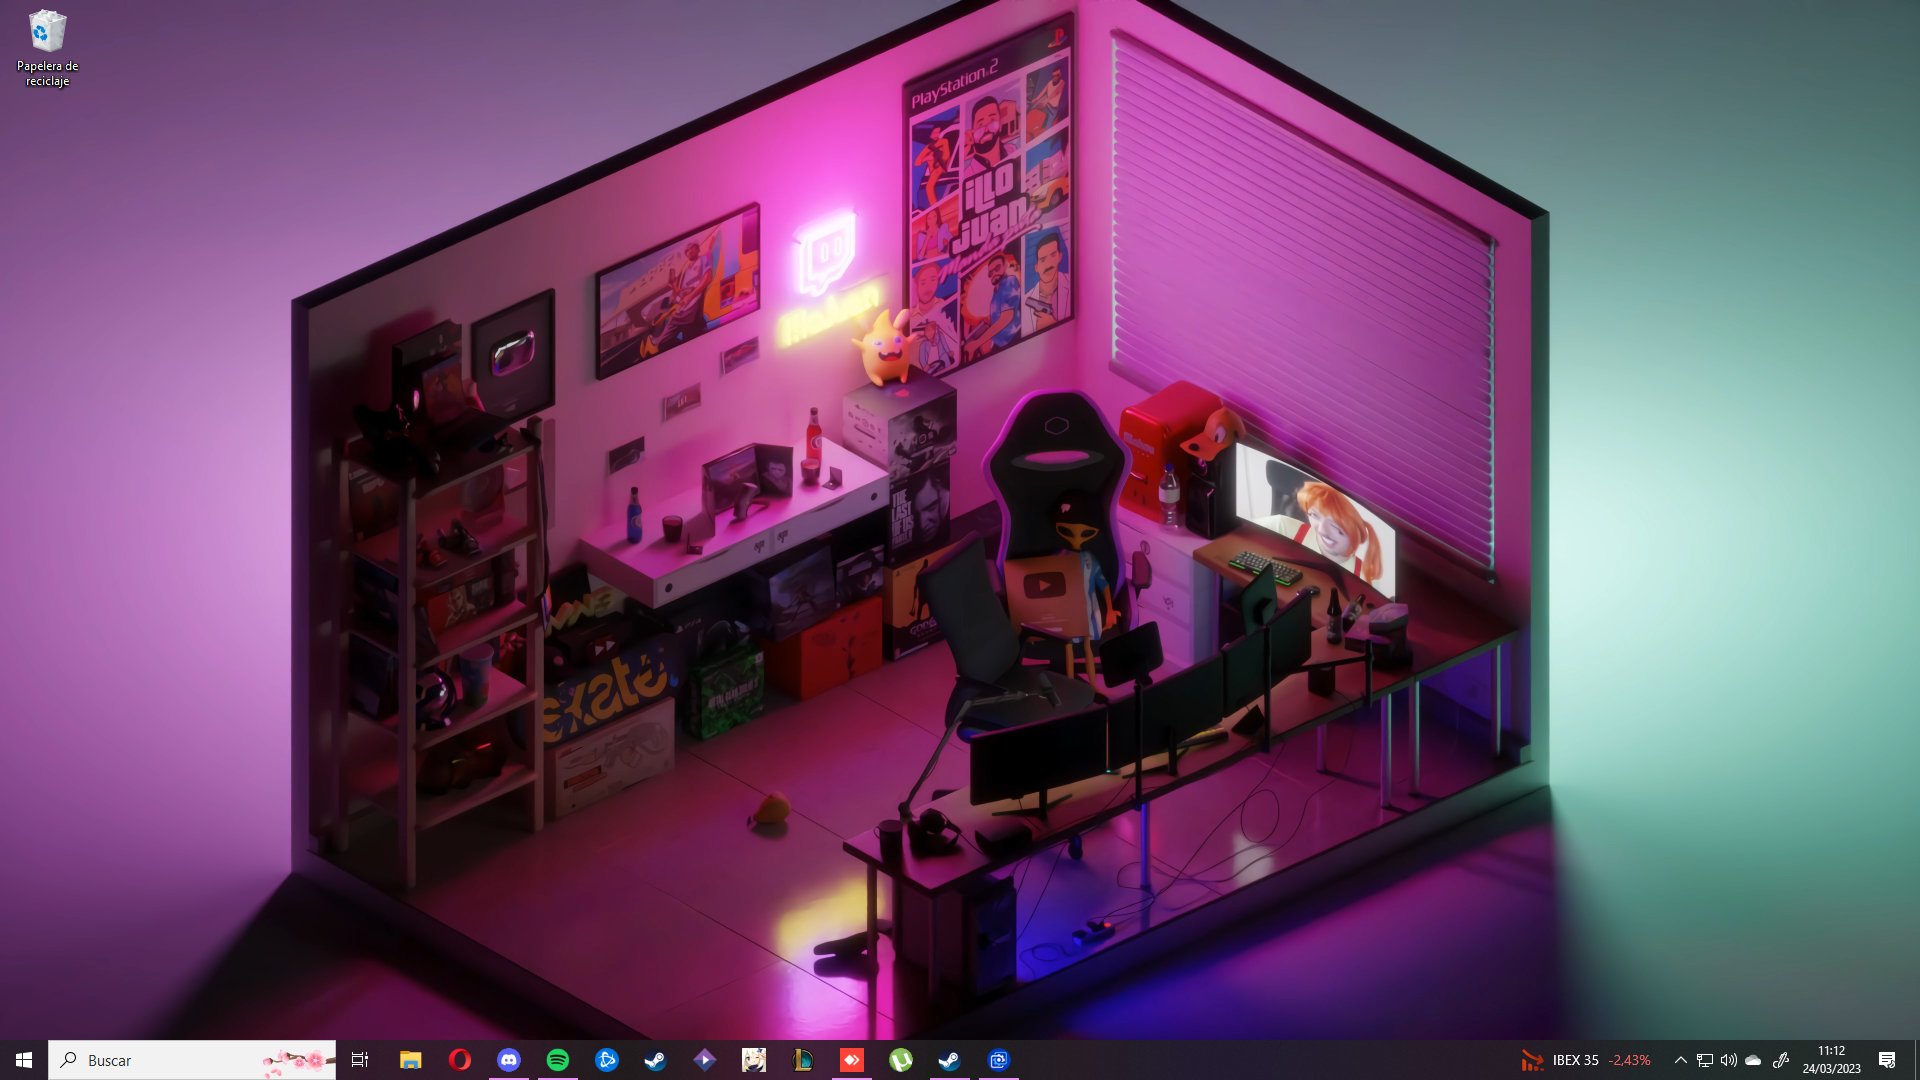
It all started when I saw the streamer's spectacular render IlloJuan. That image planted the seed of turning my own space into a minimalist isometric setup.
2. The power of a good prompt
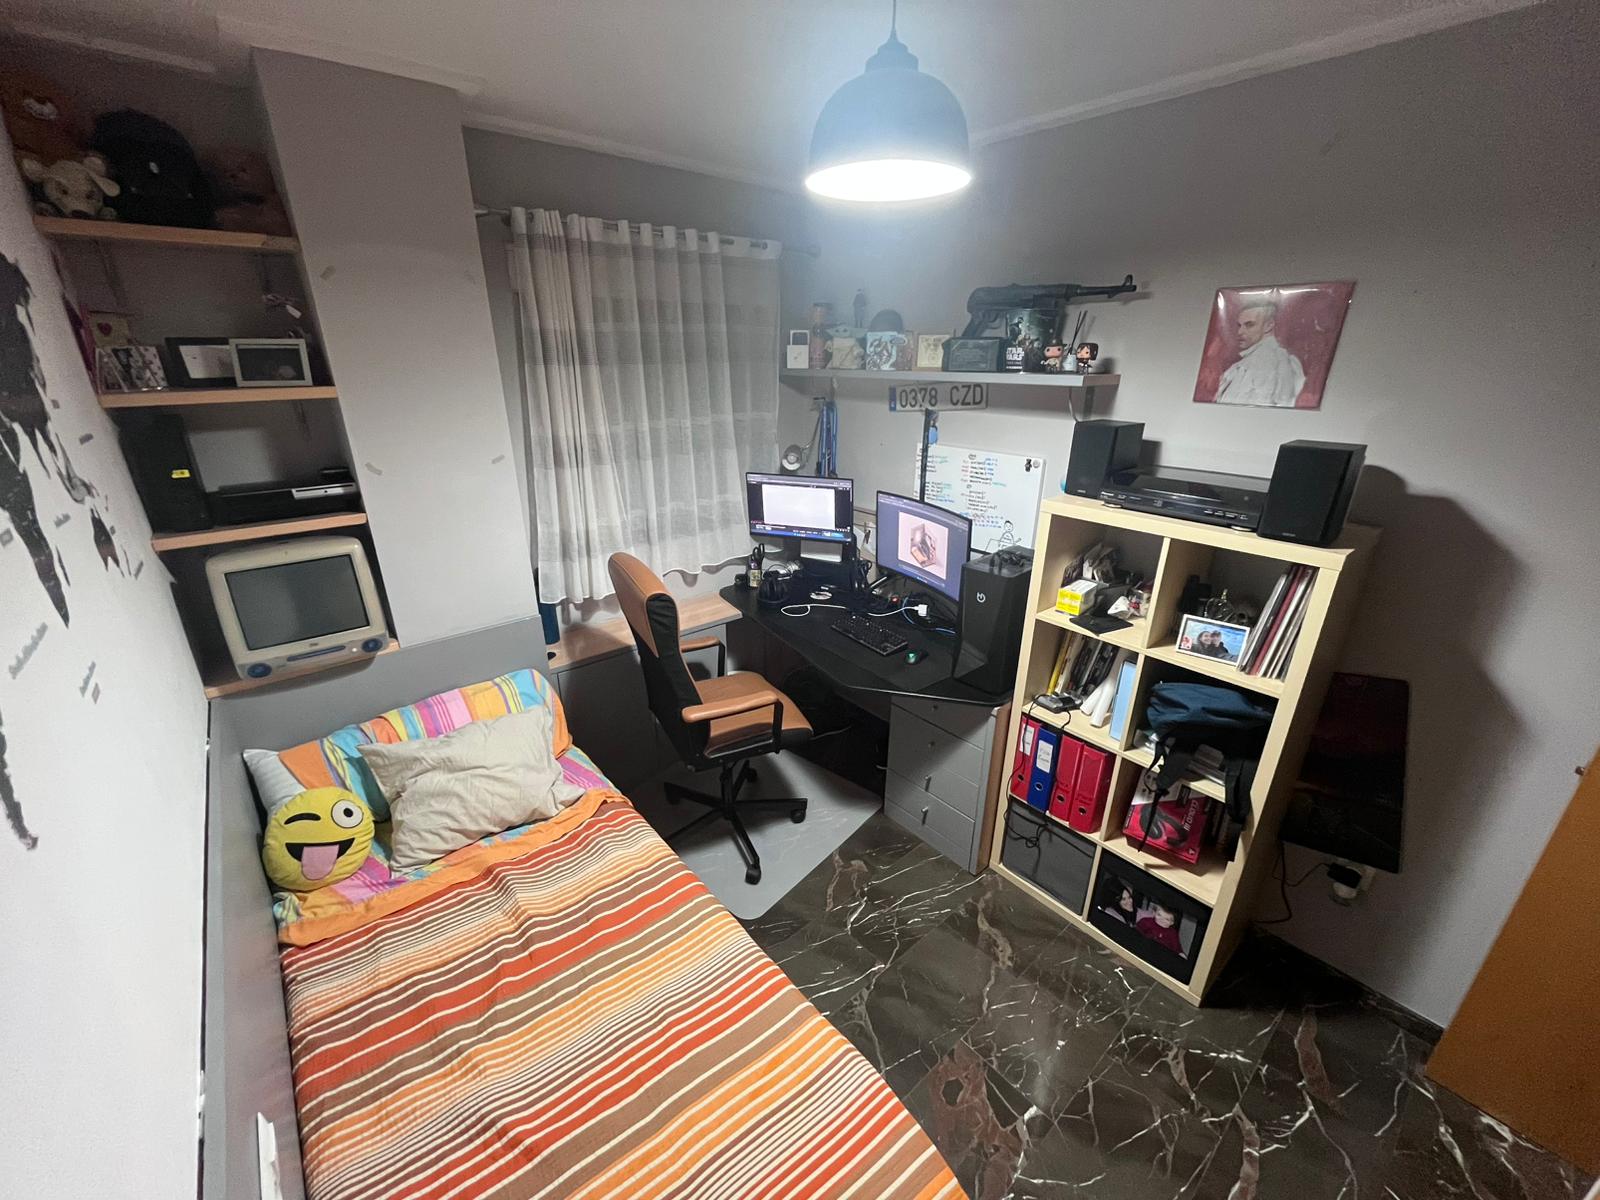
- Perfect captureI took a well-lit photo of my room from the ideal angle.
- Prompt winnerI found on Reddit an optimized template for recreating real spaces with style isometric cutaway:
Based on the image I provided, generate a picture of a tiny cute isometric room in a cutaway box, perfectly square room positioned centrally in the frame with ample negative space around all edges. Includes realistic textures, natural night lighting, like a night gaming session, detailed interior objects, floating in a subtle neutral background. 3D render in isometric perspective, 3:2 aspect ratio, medium-wide camera angle to show the entire room with breathing space around the edges. Apply subtle depth-of-field effect to enhance focus on the centered room.
3. First AI-generated render
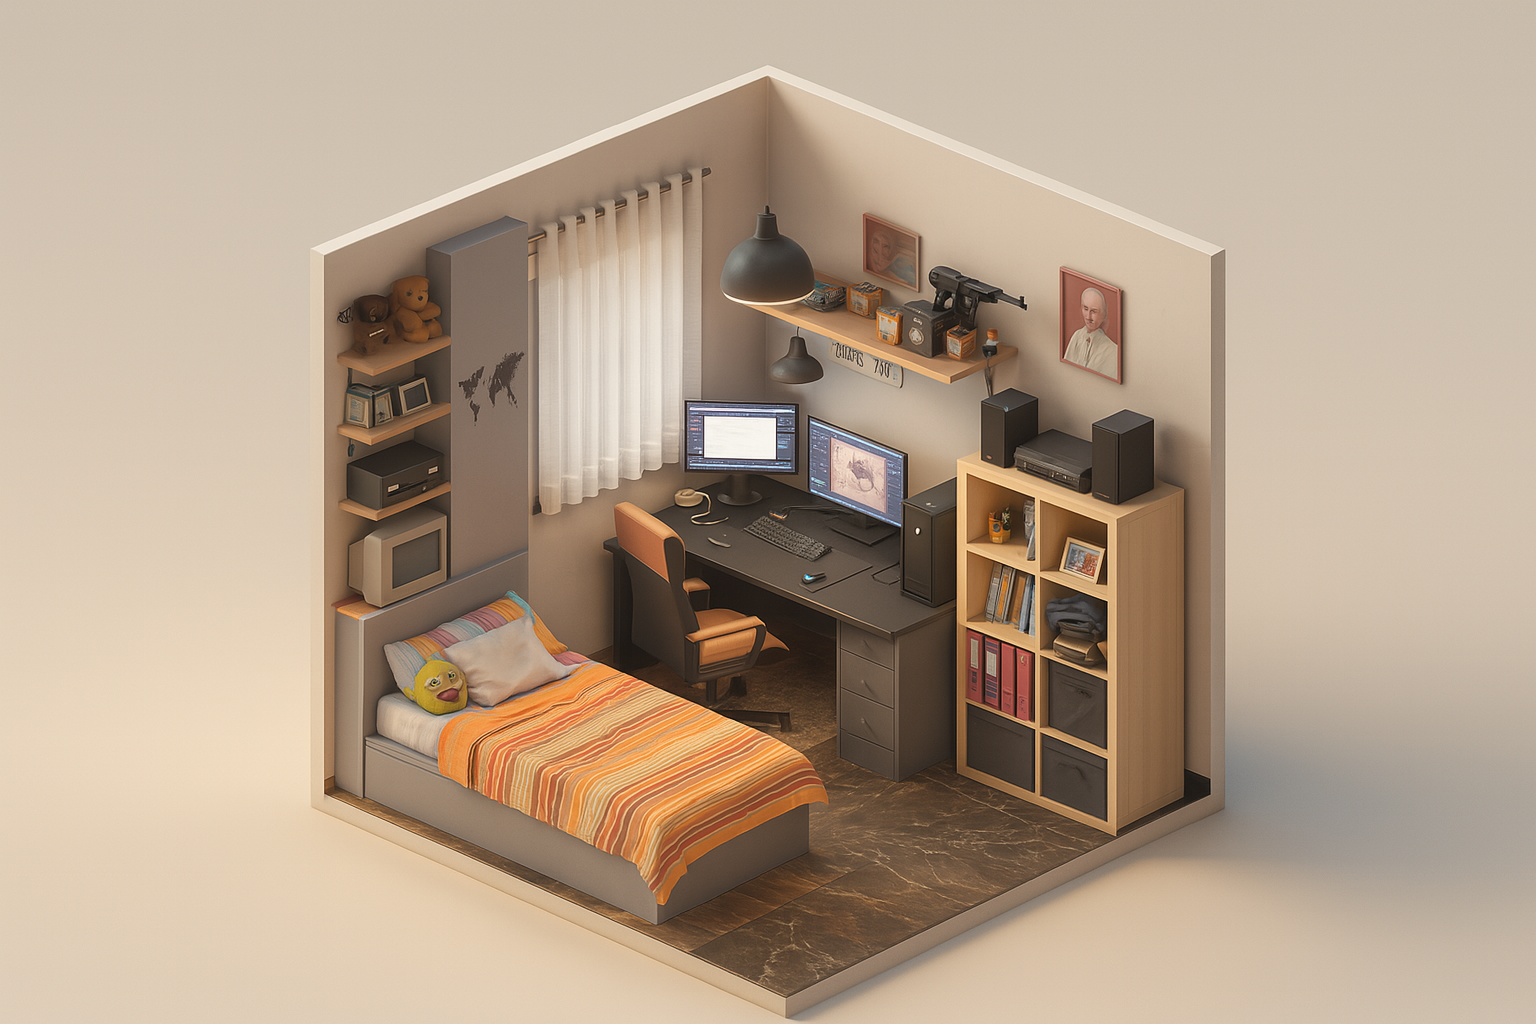
After sending the prompt, the AI returned a promising result but with minor flaws.
4. Detecting and correcting errors
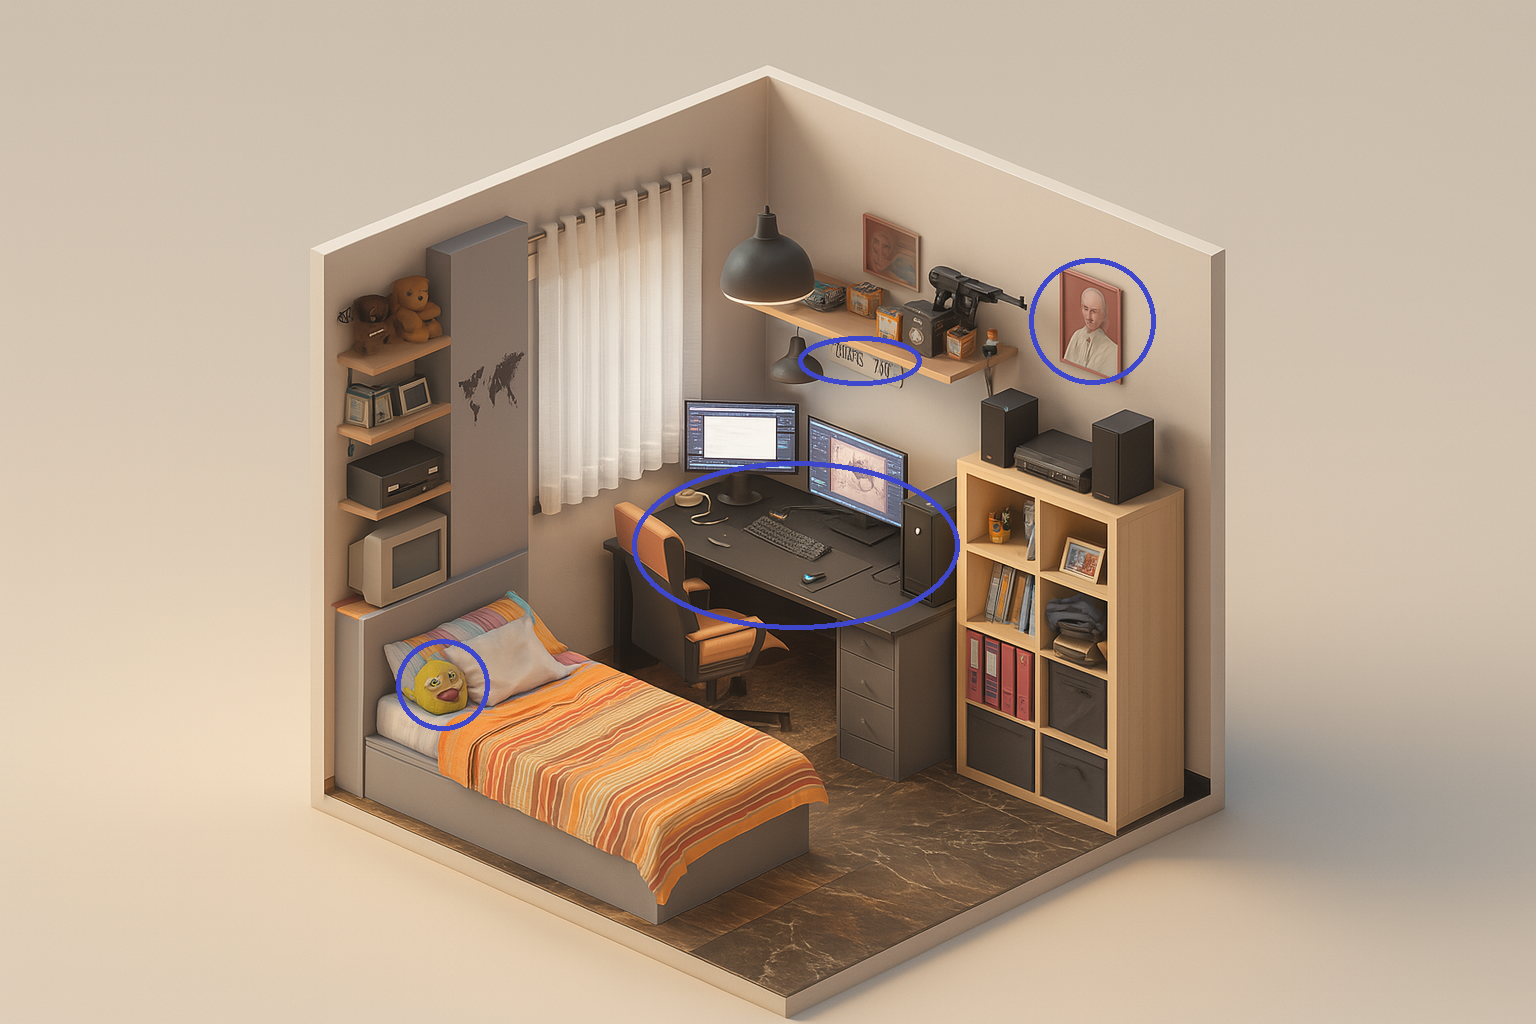
Before considering it a professional wallpaper, I detected four imperfections that needed retouching:
- Deformed cushion on the bed.
- Blurry peripherals (keyboard and mouse).
- Illegible license plate on the wall.
- Distorted vinyl cover.
5. Final retouching in Photoshop
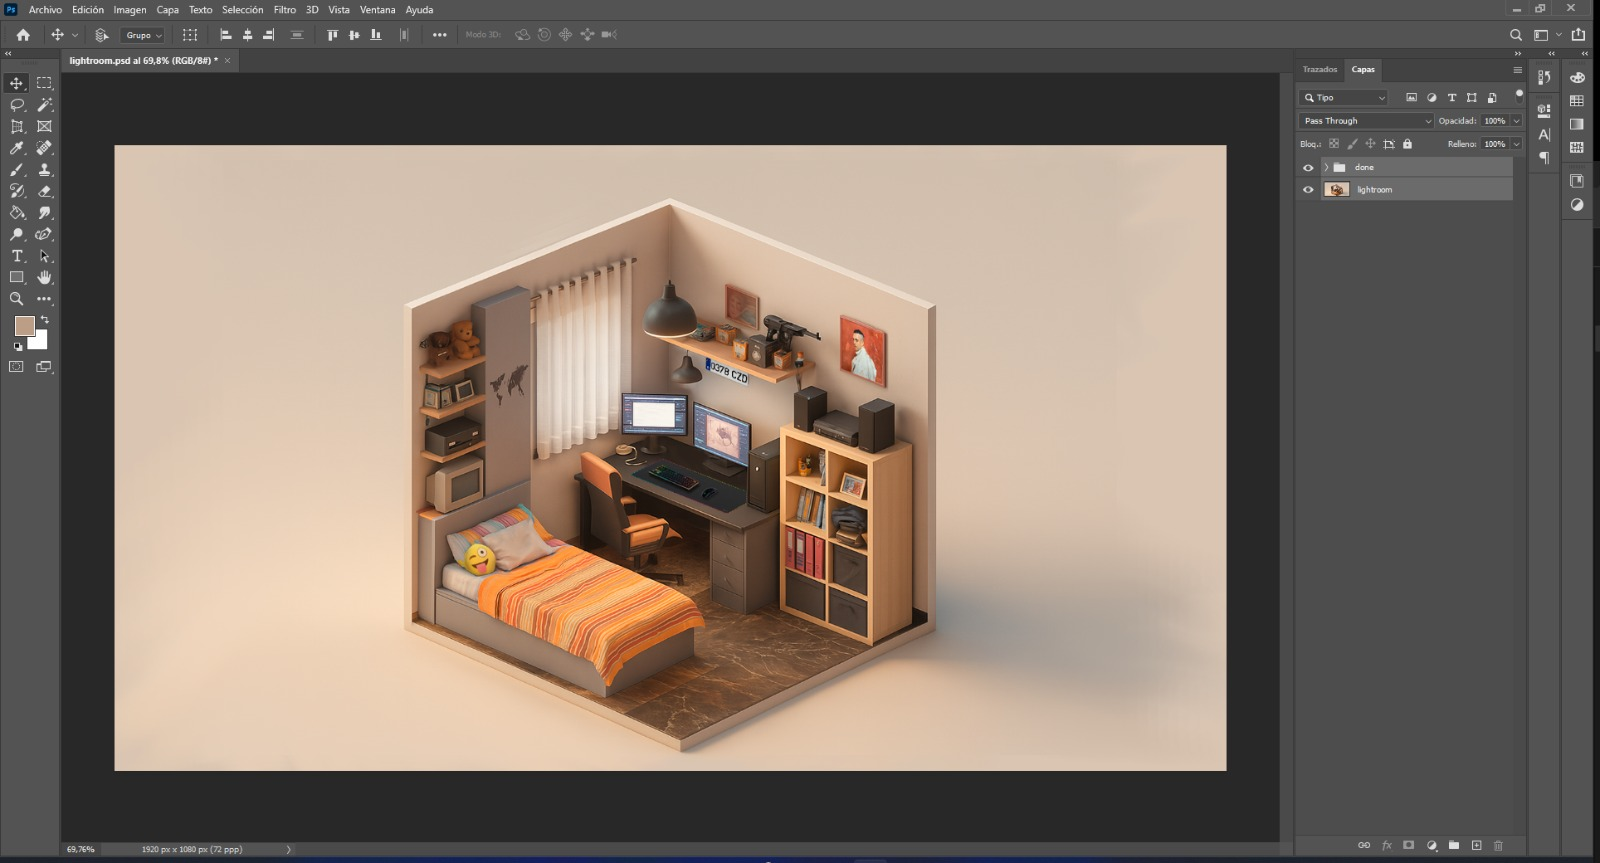
Using the render as a base, I opened Adobe Photoshop and:
- I reconstructed the cushion using the original photo.
- I replaced the keyboard and mouse with crisp versions.
- I recovered the license plate with the correct numbers.
- I reinserted the vinyl cover, adjusting the lighting.
- I exported in
1920 × 1080 pxfor a Full HD wallpaper perfect.
6. Final Wallpaper and Lessons Learned
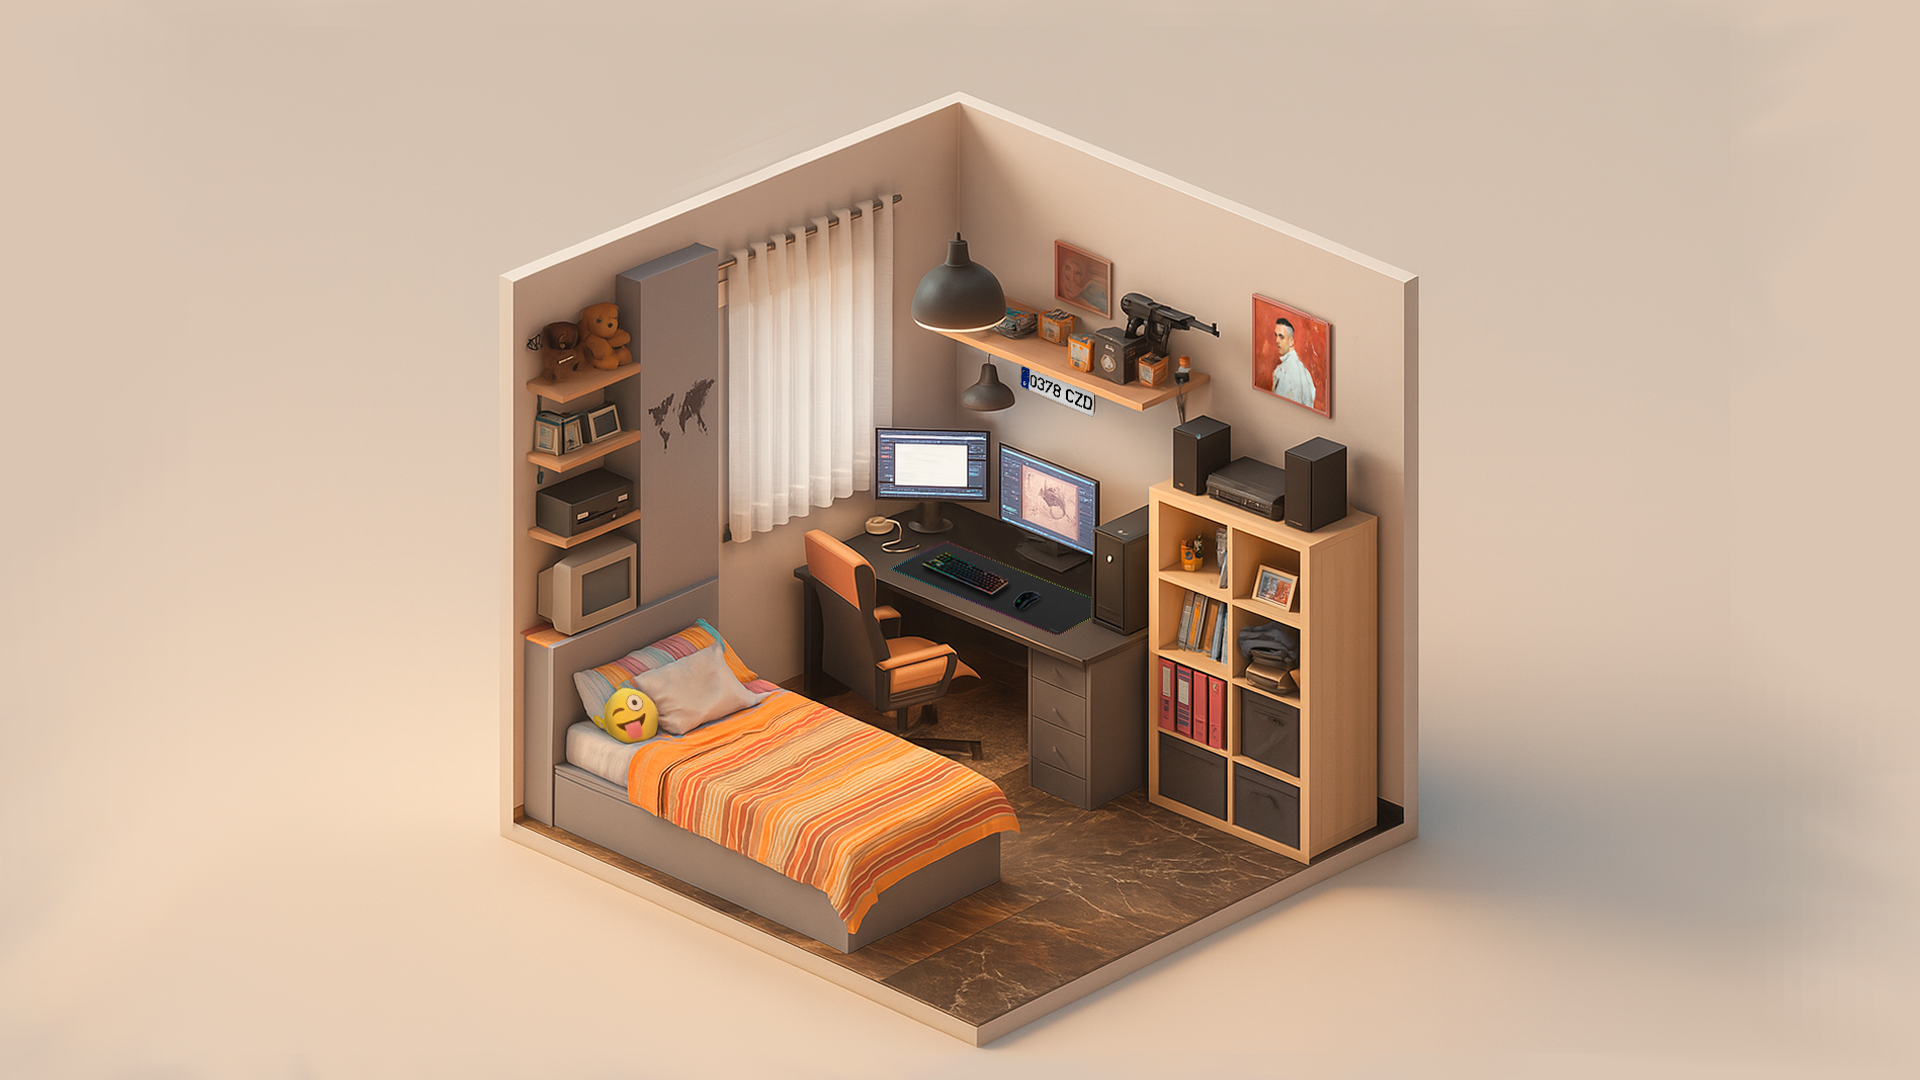
The result combines the speed of the generative AI with human precision:
- Isometric minimalist aesthetic achieved thanks to the prompt.
- Photorealistic details through manual editing.
7. Put it into practice!
- Try the prompt and experiment with angles, lighting, and textures.
- Share your creation on social media (tag me so I can see it).
Questions or suggestions? Contact me with any questions. I'd love to see how far you take this technique!